Terrarium Basics
How to Make a Closed Terrarium: Beginner's Complete Guide
A full walkthrough of building your first sealed terrarium, from container choice to the first weeks of settling in.
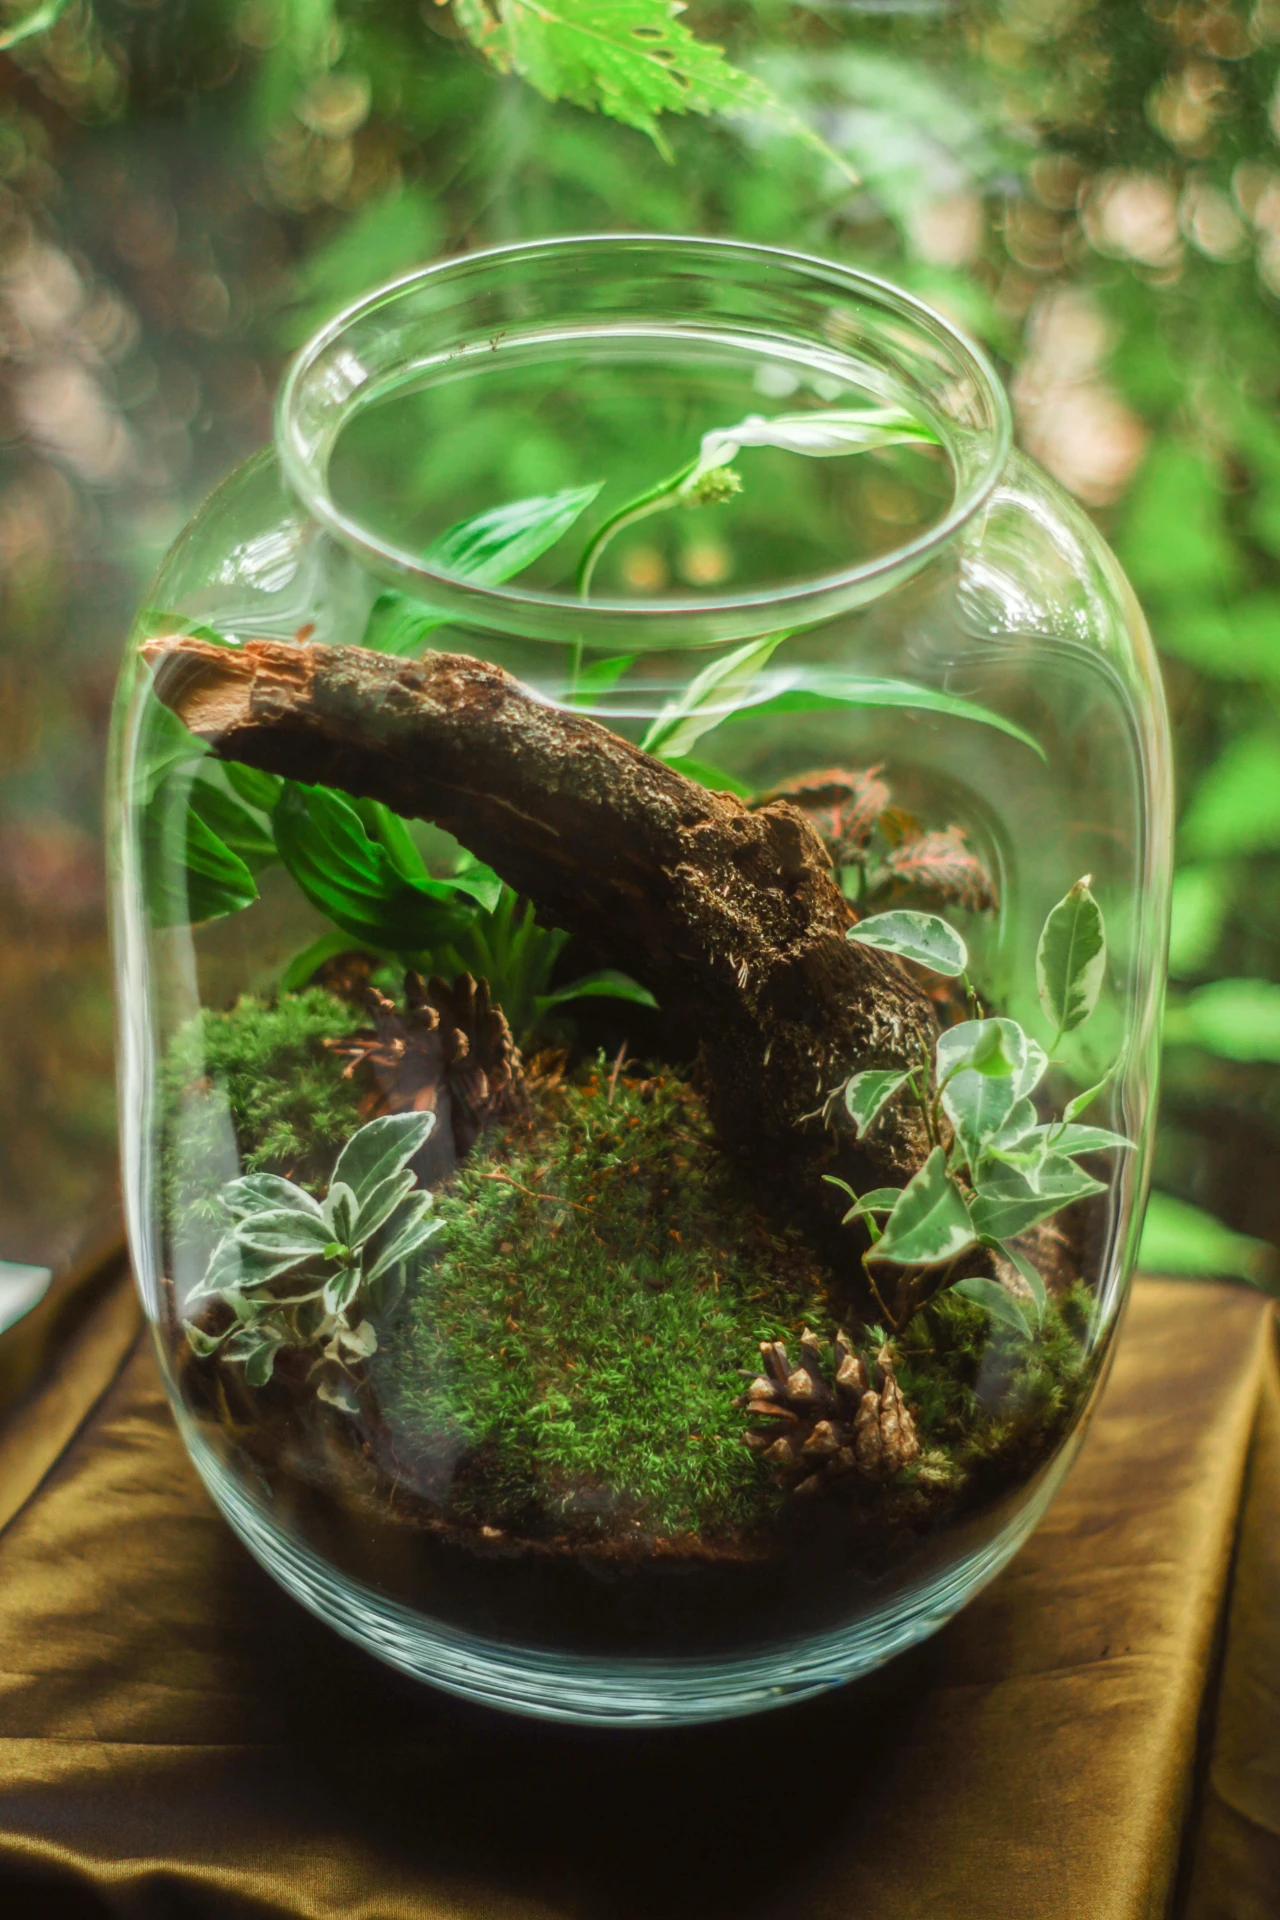
A closed terrarium is one of the easiest ways to bring a miniature landscape indoors. Once the moisture level, plants and light are balanced, the sealed container recycles much of its own water and can need very little attention.
The basic process is simple: choose a clear container with a lid, add an appropriate growing medium, plant small humidity-loving plants, add a small amount of water, seal the container and place it in bright indirect light.
The part beginners usually struggle with isn’t assembling the terrarium. It’s knowing how wet it should be, which plants belong inside it and what to do during the first couple of weeks.
This guide walks through the entire process.
Quick answer
To make a closed terrarium:
- Choose a clean, clear container with a lid.
- Add your drainage and substrate system.
- Arrange the hardscape before planting.
- Add small, humidity-loving plants.
- Add moss if desired.
- Water very lightly.
- Clean the glass and close the lid.
- Place the terrarium in bright, indirect light.
- Watch its condensation pattern for the first one to two weeks.
- Adjust moisture before leaving the terrarium mostly alone.
A healthy closed terrarium should be moist, not waterlogged.
What is a closed terrarium?
A closed terrarium is a planted container with a lid or cover that traps much of the moisture inside.
Water evaporates from the growing medium and plants, condenses against cooler surfaces such as the glass, and eventually returns to the substrate. That miniature water cycle is why an established closed terrarium may need watering only occasionally.
The Royal Horticultural Society notes that sealed terrariums maintain high humidity and recycle moisture, while Penn State Extension describes them as miniature landscapes capable of developing their own rain cycle.
Closed terrariums work best with plants that prefer humid conditions. They are very different from open terrariums designed for plants such as many succulents and cacti.
What you need to build a closed terrarium
You do not need an expensive kit.
A basic build requires:
- A clear container with a lid
- Growing substrate
- Small terrarium plants
- Water
- A spoon, chopstick or long tweezers for positioning plants
Depending on the build method you choose, you may also use:
- LECA or washed gravel
- A mesh or sphagnum barrier
- Activated horticultural charcoal
- Moss
- Stones, wood or other hardscape
- A fine mister
A wide-mouth container is easiest for a first build. Narrow bottle terrariums can look impressive, but planting and maintenance are much harder.
Optional gear worth having
Long terrarium tweezers and scissors become particularly useful once the container is too narrow for your hand.
A mister also makes it easier to add water gradually. This matters because correcting a terrarium that is slightly dry is easy. Removing a large amount of excess water is much more annoying.
Step 1: Choose the right container
Start with clear glass or clear plastic so the plants receive adequate light.
For a true closed terrarium, choose a container that can be covered with a lid, plate, cork or other reasonably tight closure.
Good beginner options include:
- Cookie jars
- Apothecary jars
- Large preserving jars
- Glass canisters
- Purpose-built terrarium containers
- Repurposed clear containers with lids
A larger container is usually more forgiving than a tiny jar because you have more space for roots, plants and moisture to balance.
Before building, wash the container thoroughly and allow it to dry.
Penn State Extension recommends beginning with a very clean container because warm, humid enclosed conditions can also favor unwanted pests and pathogens.
Step 2: Decide how you want to handle the bottom layer
You will see two common terrarium methods.
Method A: drainage layer
Many terrarium builders place a layer of LECA, gravel or another inert material below the substrate.
The idea is to create a separate reservoir where excess water can collect below most of the roots.
The RHS includes washed gravel or expanded clay among its recommended setup materials for closed terrariums.
If you use this approach, a thin mesh or suitable barrier between the drainage material and substrate can help keep the layers visually distinct.
Method B: substrate without a dedicated drainage layer
A dedicated rock layer is not mandatory.
Penn State Extension notes that adding rocks or pebbles to the bottom is no longer considered necessary for improving drainage and instead recommends using an appropriate potting medium and controlling moisture carefully.
Which should a beginner use?
Either system can work.
For a first decorative terrarium, a modest LECA or gravel layer is convenient and gives you a visible buffer for excess moisture. But it should not be treated as permission to overwater.
The most important drainage strategy in a container with no drainage hole is still:
do not add too much water.
For a deeper comparison, see LECA vs Gravel for Terrarium Drainage and Terrarium Layers Explained: The Correct Order.
Step 3: Add the substrate
Closed terrariums need a growing medium that can retain moisture while still allowing air around the roots.
Avoid filling the jar with dense outdoor garden soil. Penn State specifically advises against garden soil because it can be too heavy and prone to compaction in a terrarium.
You can use a suitable commercial potting mix or a terrarium-oriented substrate.
Add enough substrate to comfortably hold the root systems of your plants.
Rather than making the surface perfectly flat, create gentle slopes and changes in elevation. This makes even a small terrarium look deeper and more natural.
What about activated charcoal?
Activated horticultural charcoal is common in terrarium recipes, but it is better treated as an optional component rather than magic insurance against poor conditions.
Penn State recommends incorporating a small amount of charcoal into the potting medium, noting its ability to absorb chemicals and odors.
It can be useful, but good moisture control, clean materials and healthy plants matter more.
See Do Terrariums Really Need Activated Charcoal? for the full discussion.
Step 4: Plan the landscape before planting
Do not immediately start stuffing plants into the jar.
Arrange your plants and hardscape outside the container first.
Think about:
- Which direction the terrarium will usually be viewed from
- Which plant will be tallest
- Where you want visual open space
- Where moss or low plants will go
- Whether wood or stone should create a focal point
- How much room each plant needs to grow
If the terrarium will mostly be viewed from the front, taller plants usually look best toward the back.
If it will be viewed from all directions, a taller central plant can work well.
Resist the urge to fill every square inch. A newly planted terrarium should have room to grow.
Step 5: Choose plants that actually like closed terrariums
This is one of the most important choices in the entire build.
Closed terrariums create humid conditions, so the best plants are typically small tropical or woodland plants that tolerate consistent moisture and do not quickly outgrow the container.
The RHS recommends small, slow-growing foliage plants such as fittonias, peperomias, pileas, miniature ferns and mosses for sealed terrariums.
Good beginner candidates include:
- Fittonia
- Small peperomias
- Small pileas
- Miniature or compact ferns
- Selaginella
- Suitable live mosses
Choose plants with similar moisture and light requirements.
Plants to avoid
Succulents and cacti generally make poor choices for a sealed terrarium because they are adapted to much drier conditions.
Both Penn State Extension and the RHS recommend keeping these plants for open terrariums rather than humid sealed systems.
Large, fast-growing houseplants can also become frustrating because they quickly overwhelm the limited space.
For specific recommendations, see Best Plants for Closed Terrariums.
Step 6: Plant the terrarium
Remove each plant from its nursery pot and inspect it before adding it to the terrarium.
Remove:
- Dead leaves
- Damaged foliage
- Obviously unhealthy material
Gently loosen the roots if they are tightly bound.
Create a small planting hole, lower the roots into the substrate, then carefully firm the substrate around them.
Long tweezers are helpful for small openings.
Work slowly. It is much easier to reposition a plant now than after moss and hardscape have been added.
Try to keep foliage from being tightly pressed against the glass from the beginning.
Step 7: Add moss and hardscape
Once the primary plants are positioned, add finishing elements.
Possible additions include:
- Moss
- Cork bark
- Small branches
- Stones
- Pebbles
- Decorative wood
Use restraint.
The plants should remain the main feature.
Moss is particularly useful because it visually connects separate areas of substrate and creates the miniature-forest appearance many people associate with closed terrariums.
Any natural material added to an enclosed terrarium should be reasonably clean before installation.
Step 8: Add water—but much less than you think
Overwatering is one of the easiest beginner mistakes.
Remember: there is nowhere for excess water to drain out of a closed jar.
Start conservatively.
If the substrate was already moist when you built the terrarium, you may need surprisingly little additional water.
Use a mister or add small amounts around the substrate rather than pouring in a large quantity at once.
Penn State advises that it is easier to add more water later than remove excess water, while the RHS similarly recommends watering closed terrariums sparingly.
You are not trying to soak the terrarium.
You are trying to establish a moisture cycle.
Step 9: Clean the glass and close the terrarium
Before sealing the terrarium, wipe soil and debris from the inside of the glass.
If the foliage is soaking wet, give it some time to dry before placing the lid on.
Then close the terrarium.
From this point forward, condensation becomes one of your easiest diagnostic tools.
Step 10: Put it in bright, indirect light
A closed terrarium needs light for plant growth, but direct sunlight can cause the temperature inside the glass container to rise quickly.
Keep it out of hot direct sun.
The RHS recommends bright, indirect light and specifically warns against direct summer sunlight and nearby heat sources.
A location near an appropriate window may work well.
If the terrarium is positioned where natural light is insufficient, a suitable plant grow light can be used instead.
For more detail, see Does a Terrarium Need Sunlight? and Best Grow Lights for Terrariums.
The first two weeks matter most
Do not build the terrarium, seal it and forget about it immediately.
The first week or two is when you learn whether you added the right amount of moisture.
Check the glass regularly.
Light condensation
Some light condensation is normal in a closed terrarium.
It indicates that moisture is moving through the system.
Glass constantly covered in heavy water droplets
The terrarium may be too wet.
Open the lid temporarily to allow some moisture to escape, then close it again and continue observing.
Penn State recommends temporarily removing the lid when condensation becomes heavier than a light fog, while the RHS similarly advises airing the terrarium when condensation is excessive.
No condensation and dry substrate
The system may need a small amount of water.
Add it gradually rather than trying to correct the entire terrarium in one pour.
See Too Much Condensation in a Terrarium? What to Do for a complete troubleshooting guide.
How often do you water a closed terrarium?
There is no reliable universal schedule such as “once every seven days.”
A closed terrarium should be watered according to its conditions rather than a calendar.
Once established, a well-balanced sealed terrarium can need water only occasionally. The RHS notes that closed terrariums may need watering just a few times per year.
Look at:
- Moisture in the substrate
- Condensation
- Plant condition
- Room temperature
- Light exposure
- How tightly the container is sealed
If the terrarium still has adequate moisture, do not water it simply because time has passed.
See How Often Should You Water a Closed Terrarium? for the full guide.
What if mold appears?
A tiny patch of mold does not necessarily mean the entire terrarium has failed.
Closed terrariums contain moisture, organic material and limited airflow—conditions in which fungi can appear.
Remove obviously dead or decaying plant material promptly.
If mold becomes persistent or begins spreading aggressively, investigate the underlying conditions rather than simply ignoring it.
Too much moisture, decomposing material and poor plant health are all worth checking.
See Mold in a Terrarium: Normal or a Problem?
Seven beginner mistakes to avoid
- 1. Using plants that prefer dry conditions — Succulents may look attractive in glass, but they are generally better suited to open setups.
- 2. Adding too much water — A drainage layer does not make a closed jar impossible to overwater.
- 3. Putting the terrarium in direct sun — Glass plus strong sunlight can create excessive heat.
- 4. Overcrowding the container — Leave room for plants to grow.
- 5. Ignoring the first two weeks — Your early condensation pattern tells you a lot about whether the moisture level is balanced.
- 6. Using heavy garden soil — Dense soil can compact and hold excessive moisture.
- 7. Treating every layer as mandatory — Terrarium recipes vary. Focus on healthy plants, suitable substrate, appropriate moisture and light rather than believing one specific ingredient guarantees success.
Beginner shopping checklist
| Item | Essential? | Why |
|---|---|---|
| Clear lidded container | Yes | Creates the enclosed environment |
| Appropriate substrate | Yes | Supports roots and moisture |
| Small humidity-loving plants | Yes | Core living component |
| Water | Yes | Establishes the moisture cycle |
| LECA or gravel | Optional | Common bottom-layer approach |
| Activated charcoal | Optional | Common substrate/additive component |
| Long tweezers | Optional | Helpful in deep or narrow containers |
| Fine mister | Optional | Makes gradual watering easier |
| Grow light | Situational | Useful where natural light is insufficient |
| Moss | Optional | Adds texture and ground cover |
Terrarium Atlas principle: buy the things that solve a real problem in your build. You do not need every product marketed as “terrarium essential.”
What should your terrarium look like after one week?
Do not expect it to look dramatically different.
The signs you care about are simple:
- Plants remain upright and healthy
- Substrate remains moist without looking flooded
- Condensation appears but does not permanently obscure the glass
- No major plant decay develops
- The terrarium smells earthy rather than foul when opened
Some pruning or repositioning may eventually be necessary as plants establish themselves.
A closed terrarium is low-maintenance—not maintenance-free.
Your next step
Your first terrarium does not need to be elaborate.
Start with a clear, reasonably wide container, a few compact humidity-loving plants and a simple landscape. Add water cautiously, keep it out of direct sun and pay attention to what happens inside the glass during the first couple of weeks.
Once you understand that moisture balance, everything else becomes easier.
Next guides: Terrarium Layers Explained: The Correct Order; Best Plants for Closed Terrariums; How Often Should You Water a Closed Terrarium?; Mold in a Terrarium: Normal or a Problem?; Too Much Condensation in a Terrarium? What to Do.
Frequently asked questions
- Can you make a closed terrarium without a drainage layer?
- Yes. A separate rock or gravel layer is not universally considered necessary. Penn State Extension specifically notes that rocks at the bottom are no longer thought to improve drainage. Some other horticultural guidance still recommends a drainage layer, so both approaches are used successfully. Moisture control remains more important than the presence of gravel itself.
- Do closed terrariums need air?
- Plants still exchange gases, but a closed terrarium does not need to remain permanently open for normal airflow. It may need temporary ventilation when moisture is excessive or while the system is being balanced.
- Should a closed terrarium have condensation?
- Some condensation is normal. Constant heavy condensation can indicate excess moisture and may justify opening the lid temporarily.
- Can you put succulents in a closed terrarium?
- Generally, no. Most succulents and cacti prefer the drier conditions of an open terrarium rather than the consistently humid environment of a sealed container.
- Does a closed terrarium need direct sunlight?
- No. Bright indirect light is preferable. Direct sunlight can cause excessive heat inside a glass container.
- How often should I open my closed terrarium?
- There is no fixed schedule. Open it when you need to prune, remove unhealthy material or correct excessive moisture. A balanced terrarium can otherwise remain closed for long periods.
- How long can a closed terrarium last?
- There is no guaranteed lifespan. With compatible plants and well-balanced light and moisture, a closed terrarium can remain viable for years, although pruning, adjustments and occasional intervention may still be necessary.
Build Your First Terrarium With Confidence
Get the free Closed Terrarium Quick-Start Checklist.
Newsletter coming soon